Thursday, February 12, 2015

2011 to 2015... maternity leave? Sure!

I'm back! A lot has happened since 2011... How the hell does that even happen? 2011 and its 2015? Really? I will start by filling you in on the last 3ish years... My last post I had just found out that I was pregnant, well now as I type this I have a cute little 2 year old jumping on me. I gave birth to our beautiful little girl Chloe in May of 2012 in Sweden. She decided it was time to come a week late after 3 days of labour.  Here in Sweden they do not believe in inducing unless it is the last resort, I was miserable! But the 8 lbs 3 oz little beauty stole my heart and has every day since.

I know I use to focus this blog on just food, but I decided that it is going to cover all the Jazz of being  Mommy, Wife, and life being an expat in another country. Over the last few years I can't even begin to tell you the help I have received from other moms living in similar situations.  so here we go.... Again!


Meet Chloe. The feistest little girl I know and her trusted sidekick Stella!


I can't wait to start sharing again and really look forward to fill ya all in on the crazy!

Thanks for sticking around!

Thursday, September 15, 2011

Chicken Chile Verde and Versatile Blogger Award

Yesterday I got the best message from Chandra from The Plaid and Paisley Kitchen telling me that she has honored me with the versatile blogger award! I was so excited, I have only been blogging for a few months and getting recognition like this makes it even more fun.  Also, you should head over to Chandra's blog The Plaid and Paisley Kitchen She has fantastic recipes, today she has a New Mexican Corn Chowder that looks amazing!!!

Here is how the award works, I pass it along to 15 bloggers who I think are amazing and tell 7 facts about myself. So, here goes! 

The 7 Random Facts
1. Waking up early (before 10am... What don't judge!) is like pulling teeth, I don't like it and I avoid it at all cost! 
2. I got married in July to my best friend.  
3. I go to at least 5 hockey games a week, that's not counting the games we watch on TV! 
4. I prefer to eat dessert for breakfast, today was chocolate cake. 
5. I take Stella (my dog) with me everywhere I go, she even has a passport and will be traveling to the States with me in December.  
6. I secretly love it when people are not aware that I can understand Swedish because I love to eavesdrop...
7. Last but not least... I am pregnant! 


The Versatile Blogger award!!!
1. Cravings of a Lunatic
2. Eat Yourself Skinny
3. The South Padre Island Flip Flop Foodie
4. Flourtrader
5. Just One Cookbook
6. Spicie Foodie
7. Sweet Pea's Kitchen
8. Dinner, Dishes, and Desserts
9. Paper Plates and China
10. From My Sweet Heart
11. Life on Food
12. All Day I Dream About Food
13. Splendid Low-Carbing
14. PromiseMe2
15. My Life as a Mrs.


It is starting to get cold and I am having bittersweet feelings about it. I am not looking forward to the long dark (Here in Sweden it is the same as Alaska… DARK) winter, but I am getting very excited about making soups! Here is my tribute to it being just cold enough to have soup for dinner tonight.  I can’t think of a better soup to kick off the soup season! 

Chicken Chile Verde

Ingredients
1                      Chopped Onion
1                      Chopped Green bell pepper
1                      Chopped Red bell pepper
2                      Minced cloves of garlic
¼ Cup               Cilantro chopped
1 Can                Green Chiles (I used 2)
1 Tbsp               Cumin
2 Cups               Chicken broth
3-4                    Shredded chicken breasts
1 Cup                Salsa Verde (its green)
2 Cans               Refried beans
Directions
1. Sautee the onion, peppers, and garlic in a little butter until soft. 
2. Add the cilantro, green chiles, cumin, broth, chicken, salsa Verde, and refried beans. Stir to combine.
3. Put the pot into the oven and bake at 350°F/177°C for 45 minutes.
4. Garnish with Cheese, cilantro, and a lime. Serve with a warm tortilla. Enjoy!

Source: My Mamma  

Thursday, September 8, 2011

Tiramisu


This week has been so busy! I swear, Rikard and I have run from one thing to the other. I am so excited for the weekend I can barely stand it… I have reverted back to my school days where I want to pretend I am sick so Rikard won’t make me go! I know I know I am a nerd but sometimes I just don’t want to get up and go to school. I just want to lay in bed all day and watch cartoons! Ok that was a little farfetched but you get the picture. 

Last week Rikard was in Russia all week so I wanted to make him a special dinner when he got home. One of my all time favorite desserts is Tiramisu, but I have never had the courage to make it. Now that I think about that I was being so silly because it was so darn easy and honestly it was fantastic!

Also this hits way to close to home… I wanted to say all the family and friends of the people killed in the plane crash in Russia, you are in my thoughts and prayers. It truly breaks my heart for the wives, children, and family of the players, coaches and the crew.  Hockey will not be the same without those amazing people! HERE is the list of all the people that were on board the plane. 

Tiramisu

Ingredients
6                      Egg yolks
1 ¼ Cup           Sugar
1 ¼ Cup           Mascarpone cheese
2 Cups              Whipping cream
2 (12 oz.)          Packages of lady fingers
½ Cup               Coffee flavored liquor
1 Tbsp               Cocoa powder
Directions
1. Combine egg yolks and sugar in a double boiler on low. Stirring constantly for 10 minutes. Remove from heat and whip the yolk/sugar mixture until thick and yellow.
2. Whip the cream in a separate bowl.
3. Add the mascarpone cheese to the yolks and beat until combined it takes about 10 minutes (it makes it really fluffy)
4. Fold in the whipped cream and set aside.
5. Cut the lady fingers in half and line the bottom and sides of a large glass bowl. Brush them with the coffee liquor. (The more the better!)
6. Layer half of the cheese mixture on top of the lady fingers, then another layer of lady fingers brushed with coffee liquor, top with the remanding cheese mixture.
7. Sift cocoa powder on top and refrigerate overnight. ENJOY! 

Source: Allrecipes


Sunday, September 4, 2011

Fast & Delicious Chicken Marinade


I started school last Monday…. Wow, that is weird to say! Rikard has been begging me to go to school and learn Swedish the right way for over a year now. So I finally bit the bullet and started.  So within the next 6 months I will be fluent in Swedish, 3 hours a day is a bit much for my liking though. 

With me being in school most of the day (ok ok 3 hours, but it takes a long time driving and getting ready!) I have been looking for recipes that I can throw together before I leave for school in the morning.  I am also getting a little worried that summer is leaving me… and fast. So I want everything cooked on the BBQ!  This marinade is so simple and I always have the ingredients in the house.  I get creative most the time and just start dumping different spices into it, but it always turns out great.  


Delicious Chicken Marinade

Ingredients
¼ Cup               White wine vinegar (or balsamic)
¼ Cup               Olive oil
½ tsp                Chili powder
1 or 2                crushed bay leaves
½ tsp                Onion powder
½ tsp                Garlic Powder
½ tsp                Pepper
½ tsp                Oregano
½ tsp                dried basil
½ tsp                Red pepper flakes (optional)
4                      Chicken breasts
Directions
1. Combine all ingredients in a resealable bag. Refrigerate for at least 3 hours, but best is over night.
2. I also have put them in the freezer so all I have to do is thaw them out. The flavor is amazing!
3. Grill on the BBQ or in a skillet. Enjoy!


Thursday, September 1, 2011

Chocolate Covered Toasted Coconut Caramels


I have been on a huge caramel kick the last month… HUGE! I have been making anything and everything with caramel in it. These were especially fun to make because Rikard was so excited to help make them. It’s amazing how much easier things like this are when you have someone helping you. 


Chocolate Covered Toasted Coconut Caramels

Ingredients
½ Cup               Butter
½ Cup               Light corn Syrup
½ Cup               Light brown sugar
½ Cup               White sugar
½ Cup               sweetened condensed milk
1 tsp                 Vanilla
3 Cups               Shredded coconut
2                      Large bars of milk chocolate
Directions
1. Put the coconut in a glass microwave safe bowl and microwave on high for 3-5 minutes stirring every 30 seconds until toasted. 
2. Melt butter. Mix in the corn syrup, brown sugar, white sugar, and sweetened condensed milk. Microwave on high for 3 ½ minutes. Stir. Microwave for an additional 3 ½ minutes (soft ball stage). Add Vanilla
3. Stir toasted coconut into the caramel and pour into a buttered dish. Refrigerate for 1 hour.
4. Microwave chocolate stirring every 30 seconds until smooth.
5. Make bite size balls of the coconut caramel (I used a melon scoop). Dip into chocolate. Cool on wax paper. Sprinkle with a little coconut.

I prefer to keep them in the fridge… You might need to put a lock on the fridge to keep these bad boys for disappearing! Enjoy.


Tuesday, August 30, 2011

Tuna Casserole


My sister Dena is known for making a killer tuna casserole.  I struggle with tuna but Rikard loves it so I called her up the other day and had her walk me through it.  She suggested using bread crumbs on top but I didn’t have any so I used fried onions and it was delicious.  I love casseroles like this; you can pretty much put anything into them.  I actually really enjoyed this casserole and finally found a way I will eat tuna.

  This also would be a great freezer meal.  I am always on the lookout for good freezer meals. Whenever I go back to the States to visit I make a bunch of freezer meals for Rikard, I like to give him a good combination of meals.  I mean seriously poor guy all alone in the house without me, the least I can do is still feed him. Haha  

My dear friend Fanny says a saying that pops into my head right now… I hope I don’t mess this up. “When the cats go out, the rats come out to play”. Usually it is Fanny and I that are the rats when the guys are out of town working. 

Tuna Casserole

Ingredients
2 Cans               Tuna
2 Cans               Cream of mushroom or cream of chicken soup
4 Cups               Cooked macaroni noodles
7or8                  Sliced Mushrooms
1                      Diced onion
1 Cup                Frozen Peas
1 Cup                Shredded cheese
1 Cup                French’s fried onions Or any fried onions
Directions
1.  Cook noodles al dente. The last few minutes throw the onions into the boiling water (just to soften them up, so they aren’t too strong in the casserole)
2. Mix Tuna, Cream of mushroom/Cream of chicken, Noodles, Mushrooms, the softened diced onion and the peas. Pour into a casserole dish.
3. Sprinkle fried onions on top of the mixture and top that with shredded cheese. 
4. Bake at 350°F/177°C for 45 minutes. Enjoy.

Source: Dena Bird 


Sunday, August 28, 2011

Easy Mexican Flan


I have a secret love affair with (Shh don’t tell) Mexican food.  We are close I mean, really close. If it were up to me we would have Mexican food for dinner every night.  OK… I am pretty close with Indian food also but that’s for another day. 

Here in Sweden they honestly don’t know what Real Mexican food is… I mean seriously they put cucumbers in their tacos… WTF! It has been my mission ever since we moved here to teach as many Swedes what real Mexican food tastes like.  When you think Mexican dessert what comes to mind? Tres Leches and Flan, right? Well… Have I got a Flan recipe for you! I am sort of a Flan snob and I can honestly tell you I would choose this Flan over a crème Brule any day. The best part is, it’s actually really simple.  Who says you have to be Mexican to cook good Mexican food? 


Easy Mexican Flan

Ingredients
1 Cup and ½ Cup   Sugar
6                            Eggs
1 Can                    14 oz. Sweetened condensed milk
1 Cup                    Heavy cream
½ Cup                   Milk
1 tsp                     Vanilla
Or
Exchange the heavy cream and milk for 2 13 oz. cans of evaporated milk. 
Directions
1.  Put 1 cup sugar into a small sauce pan over medium heat stirring constantly. It will slowly melt down to a caramel color liquid. Be careful not to let it burn.
2. Once all of the sugar is liquid equally pour into ramekins (6 to 8 depending on their size). Swirl the liquid around until it has covered the sides. You will have to hurry it cools very quickly.  (I never get all of them perfect and it works out just fine)
3. Blend the eggs together, add the milks then slowly add the ½ cup sugar and vanilla. Stir until combined. 
3. Pour the milk mixture into the prepared ramekins. Place them into a large baking dish filled with 1 to 2 Inches (2.54 to 5cm) of water. Bake at 325°F/163°C for 45 minutes or until a toothpick or a knife comes out clean. 
4. Cool the ramekins in the refrigerator for at least one hour before serving.
5. Slide a knife around the edge then tip the ramekin over onto a plate the caramel sauce will spill over the custard. Serve with fresh berries or just alone. YUM!

Source: About.com  


Friday, August 26, 2011

European Samoas Cookie


Do you remember what your favorite cookie was when you were a kid?  Well… Mine was the Girl Scout cookie called Samoas.  The perfect caramely coconutty cookie! Yes I did just say that, Spell check hates me right now.

 I have had a problem because ever since we moved to Sweden Girl Scout Cookies are not an option.  Until now… I came across a post from Claudia at What's Cookin' Italian Style Cuisine for these delicious little treat, she is a genius! So, here is my version of her Samoas cookie. I like to call them the European Samoas cookie… The richness of the homemade caramel makes them so delicious! 


European Samoas

Ingredients
Crust
½ Cup               Sugar   
¾ Cup               Butter
1                        Egg      
1 tsp                  Vanilla or vanilla powder
2 Cups               Flour    
½ tsp                 Salt
Topping
4 Cups             Coconut
1                      Batch of Microwave Caramel
1or2 Tbsp        Whipping cream
2 bars               Good Milk Chocolate
Directions
Crust
1. Mix Butter, sugar, egg and Vanilla.
2. Slowly add in flour and salt.
3. Push dough into bottom of a 9x13 pan.
4. Bake at 350°f/177°C for 20 minutes.
Topping
1. Put coconut in a microwave safe bowl and microwave on high for 3 to 5 minutes. Stirring it every 30 seconds, until it is all toasted.
2. Take the batch of caramel (if there is any left…) heat is back up in the microwave with 2 Tbsp of cream for 1 or 2 minutes. Just until its soft again.  
3. Add toasted coconut and spread over cooled crust. Refrigerate for an hour then cut into bite size squares.
4. Melt Chocolate and dip bottoms of each square. Drizzle remaining chocolate over top. Enjoy!


Wednesday, August 24, 2011

Microwave Caramel


There are a few things about me that you have probably already figured out. #1 I love quick and easy recipes (I have a very short attention span). #2 I love making things in the microwave (it just makes it so much easier!).  I am so excited to share this recipe with you I can barely stand it!


I’ll back up a bit… A few days ago Stella decided to eat one of my plants, this darn dog eats everything! This specific plant is very poisonous and she had an extreme allergic reaction. So within 5 minutes of me getting after her for eating the plant, she swelled up like a balloon. We immediately jumped into the car and headed to the vet (this was very dramatic I was yelling at Rikard to drive faster the entire time).  Thank goodness we live close to the vet because by the time we got there poor little Miss Stella had stopped breathing.  So, there I am running into the vet screaming “I need help!” carrying Stella.  They immediately got her on oxygen, gave her shots and saved our sweet little pup. After everything settled down, all I could think was the little girl in Charlie and The Chocolate Factory. Violet Beauregarde, the gum chewing champ, who blew up like a blueberry! Good thing she is cute! (Stella not Violet Beauregarde).

So needless to say, I needed some serious cooking therapy when we got home.  The first thing I did was pop this into the microwave. Oh delicious caramel you fix everything!


Microwave Caramel

Ingredients
½ Cup               Butter
½ Cup               Light corn syrup
½ Cup               Light brown sugar
½ Cup               White sugar
½ Cup               Sweetened condensed milk
1 tsp                 vanilla
½ Cup               Chopped Nuts (optional)
Directions
1.  Melt butter in microwave safe bowl. Stir in corn syrup, both sugars, and sweetened condensed milk. Mix until sugars are dissolved.
2.  Microwave on high for 3 ½ minutes. Stir.
3.  Microwave on high for an additional 3 ½ minutes (soft-ball stage)
4.  Stir in vanilla and nuts (if you add them)
5.  Spray a dish with non stick spray. Pour into dish and refrigerate until set.
6.  Cut into squares and wrap in plastic wrap. Enjoy!  

Source: Bake Space


Monday, August 22, 2011

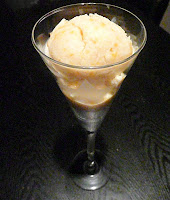
Coconut Mango Ice Cream


I have been seeing so many posts about ice cream lately so I have been craving it like crazy.  So I got a little creative and this is what I came up with. I have a hard time with a lot of dairy (milk) so I use coconut milk or soy milk whenever I can. We always have milk here because Rikard is one of those tall glass of milk guys… You know what I am talking about, one of those people who like to have a big glass of milk with a dessert. YUCK.  Just watching him drink his milk brings the heaves on!


I know I am weird, but milk and I have beef! Haha I love yogurt and cheese but there is something just really gross to me about milk. What? Don’t judge. I still cook with it! Ok enough of that… You are going to really like this it was so easy and so delicious. 

I don't have an ice cream maker and this was still creamy. 

Coconut Mango Ice Cream

Ingredients
1 can                Sweetened condensed milk
1 can                Coconut Milk
2 cups               Canned or frozen mangos (pureed)
Directions
1.  Mix all ingredients and pour into a freezer safe bowl. Freeze.
2.  Every 30 minutes for the first 3 hours stir the mixture. Enjoy.

Adapted from: Just One Cookbook