Showing posts with label Dessert. Show all posts

Thursday, September 8, 2011

Tiramisu


This week has been so busy! I swear, Rikard and I have run from one thing to the other. I am so excited for the weekend I can barely stand it… I have reverted back to my school days where I want to pretend I am sick so Rikard won’t make me go! I know I know I am a nerd but sometimes I just don’t want to get up and go to school. I just want to lay in bed all day and watch cartoons! Ok that was a little farfetched but you get the picture. 

Last week Rikard was in Russia all week so I wanted to make him a special dinner when he got home. One of my all time favorite desserts is Tiramisu, but I have never had the courage to make it. Now that I think about that I was being so silly because it was so darn easy and honestly it was fantastic!

Also this hits way to close to home… I wanted to say all the family and friends of the people killed in the plane crash in Russia, you are in my thoughts and prayers. It truly breaks my heart for the wives, children, and family of the players, coaches and the crew.  Hockey will not be the same without those amazing people! HERE is the list of all the people that were on board the plane. 

Tiramisu

Ingredients
6                      Egg yolks
1 ¼ Cup           Sugar
1 ¼ Cup           Mascarpone cheese
2 Cups              Whipping cream
2 (12 oz.)          Packages of lady fingers
½ Cup               Coffee flavored liquor
1 Tbsp               Cocoa powder
Directions
1. Combine egg yolks and sugar in a double boiler on low. Stirring constantly for 10 minutes. Remove from heat and whip the yolk/sugar mixture until thick and yellow.
2. Whip the cream in a separate bowl.
3. Add the mascarpone cheese to the yolks and beat until combined it takes about 10 minutes (it makes it really fluffy)
4. Fold in the whipped cream and set aside.
5. Cut the lady fingers in half and line the bottom and sides of a large glass bowl. Brush them with the coffee liquor. (The more the better!)
6. Layer half of the cheese mixture on top of the lady fingers, then another layer of lady fingers brushed with coffee liquor, top with the remanding cheese mixture.
7. Sift cocoa powder on top and refrigerate overnight. ENJOY! 

Source: Allrecipes


Thursday, September 1, 2011

Chocolate Covered Toasted Coconut Caramels


I have been on a huge caramel kick the last month… HUGE! I have been making anything and everything with caramel in it. These were especially fun to make because Rikard was so excited to help make them. It’s amazing how much easier things like this are when you have someone helping you. 


Chocolate Covered Toasted Coconut Caramels

Ingredients
½ Cup               Butter
½ Cup               Light corn Syrup
½ Cup               Light brown sugar
½ Cup               White sugar
½ Cup               sweetened condensed milk
1 tsp                 Vanilla
3 Cups               Shredded coconut
2                      Large bars of milk chocolate
Directions
1. Put the coconut in a glass microwave safe bowl and microwave on high for 3-5 minutes stirring every 30 seconds until toasted. 
2. Melt butter. Mix in the corn syrup, brown sugar, white sugar, and sweetened condensed milk. Microwave on high for 3 ½ minutes. Stir. Microwave for an additional 3 ½ minutes (soft ball stage). Add Vanilla
3. Stir toasted coconut into the caramel and pour into a buttered dish. Refrigerate for 1 hour.
4. Microwave chocolate stirring every 30 seconds until smooth.
5. Make bite size balls of the coconut caramel (I used a melon scoop). Dip into chocolate. Cool on wax paper. Sprinkle with a little coconut.

I prefer to keep them in the fridge… You might need to put a lock on the fridge to keep these bad boys for disappearing! Enjoy.


Sunday, August 28, 2011

Easy Mexican Flan


I have a secret love affair with (Shh don’t tell) Mexican food.  We are close I mean, really close. If it were up to me we would have Mexican food for dinner every night.  OK… I am pretty close with Indian food also but that’s for another day. 

Here in Sweden they honestly don’t know what Real Mexican food is… I mean seriously they put cucumbers in their tacos… WTF! It has been my mission ever since we moved here to teach as many Swedes what real Mexican food tastes like.  When you think Mexican dessert what comes to mind? Tres Leches and Flan, right? Well… Have I got a Flan recipe for you! I am sort of a Flan snob and I can honestly tell you I would choose this Flan over a crème Brule any day. The best part is, it’s actually really simple.  Who says you have to be Mexican to cook good Mexican food? 


Easy Mexican Flan

Ingredients
1 Cup and ½ Cup   Sugar
6                            Eggs
1 Can                    14 oz. Sweetened condensed milk
1 Cup                    Heavy cream
½ Cup                   Milk
1 tsp                     Vanilla
Or
Exchange the heavy cream and milk for 2 13 oz. cans of evaporated milk. 
Directions
1.  Put 1 cup sugar into a small sauce pan over medium heat stirring constantly. It will slowly melt down to a caramel color liquid. Be careful not to let it burn.
2. Once all of the sugar is liquid equally pour into ramekins (6 to 8 depending on their size). Swirl the liquid around until it has covered the sides. You will have to hurry it cools very quickly.  (I never get all of them perfect and it works out just fine)
3. Blend the eggs together, add the milks then slowly add the ½ cup sugar and vanilla. Stir until combined. 
3. Pour the milk mixture into the prepared ramekins. Place them into a large baking dish filled with 1 to 2 Inches (2.54 to 5cm) of water. Bake at 325°F/163°C for 45 minutes or until a toothpick or a knife comes out clean. 
4. Cool the ramekins in the refrigerator for at least one hour before serving.
5. Slide a knife around the edge then tip the ramekin over onto a plate the caramel sauce will spill over the custard. Serve with fresh berries or just alone. YUM!

Source: About.com  


Friday, August 26, 2011

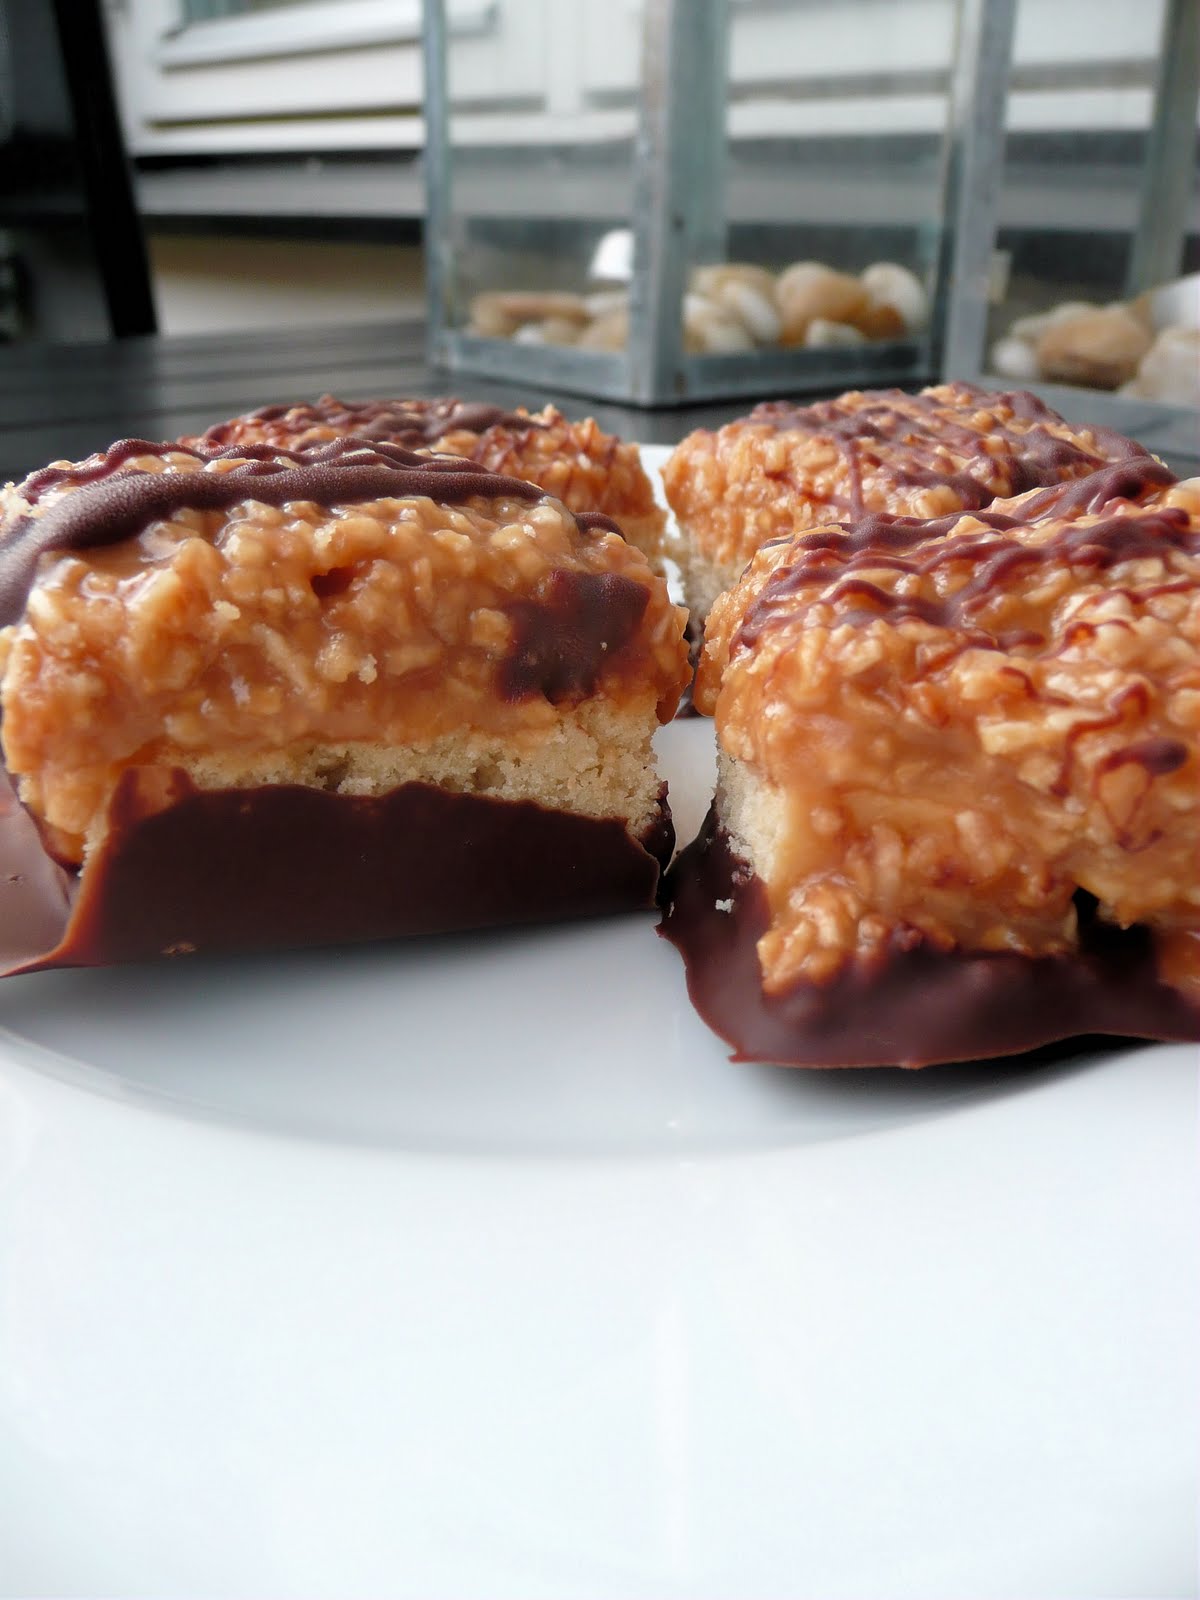
European Samoas Cookie


Do you remember what your favorite cookie was when you were a kid?  Well… Mine was the Girl Scout cookie called Samoas.  The perfect caramely coconutty cookie! Yes I did just say that, Spell check hates me right now.

 I have had a problem because ever since we moved to Sweden Girl Scout Cookies are not an option.  Until now… I came across a post from Claudia at What's Cookin' Italian Style Cuisine for these delicious little treat, she is a genius! So, here is my version of her Samoas cookie. I like to call them the European Samoas cookie… The richness of the homemade caramel makes them so delicious! 


European Samoas

Ingredients
Crust
½ Cup               Sugar   
¾ Cup               Butter
1                        Egg      
1 tsp                  Vanilla or vanilla powder
2 Cups               Flour    
½ tsp                 Salt
Topping
4 Cups             Coconut
1                      Batch of Microwave Caramel
1or2 Tbsp        Whipping cream
2 bars               Good Milk Chocolate
Directions
Crust
1. Mix Butter, sugar, egg and Vanilla.
2. Slowly add in flour and salt.
3. Push dough into bottom of a 9x13 pan.
4. Bake at 350°f/177°C for 20 minutes.
Topping
1. Put coconut in a microwave safe bowl and microwave on high for 3 to 5 minutes. Stirring it every 30 seconds, until it is all toasted.
2. Take the batch of caramel (if there is any left…) heat is back up in the microwave with 2 Tbsp of cream for 1 or 2 minutes. Just until its soft again.  
3. Add toasted coconut and spread over cooled crust. Refrigerate for an hour then cut into bite size squares.
4. Melt Chocolate and dip bottoms of each square. Drizzle remaining chocolate over top. Enjoy!


Wednesday, August 24, 2011

Microwave Caramel


There are a few things about me that you have probably already figured out. #1 I love quick and easy recipes (I have a very short attention span). #2 I love making things in the microwave (it just makes it so much easier!).  I am so excited to share this recipe with you I can barely stand it!


I’ll back up a bit… A few days ago Stella decided to eat one of my plants, this darn dog eats everything! This specific plant is very poisonous and she had an extreme allergic reaction. So within 5 minutes of me getting after her for eating the plant, she swelled up like a balloon. We immediately jumped into the car and headed to the vet (this was very dramatic I was yelling at Rikard to drive faster the entire time).  Thank goodness we live close to the vet because by the time we got there poor little Miss Stella had stopped breathing.  So, there I am running into the vet screaming “I need help!” carrying Stella.  They immediately got her on oxygen, gave her shots and saved our sweet little pup. After everything settled down, all I could think was the little girl in Charlie and The Chocolate Factory. Violet Beauregarde, the gum chewing champ, who blew up like a blueberry! Good thing she is cute! (Stella not Violet Beauregarde).

So needless to say, I needed some serious cooking therapy when we got home.  The first thing I did was pop this into the microwave. Oh delicious caramel you fix everything!


Microwave Caramel

Ingredients
½ Cup               Butter
½ Cup               Light corn syrup
½ Cup               Light brown sugar
½ Cup               White sugar
½ Cup               Sweetened condensed milk
1 tsp                 vanilla
½ Cup               Chopped Nuts (optional)
Directions
1.  Melt butter in microwave safe bowl. Stir in corn syrup, both sugars, and sweetened condensed milk. Mix until sugars are dissolved.
2.  Microwave on high for 3 ½ minutes. Stir.
3.  Microwave on high for an additional 3 ½ minutes (soft-ball stage)
4.  Stir in vanilla and nuts (if you add them)
5.  Spray a dish with non stick spray. Pour into dish and refrigerate until set.
6.  Cut into squares and wrap in plastic wrap. Enjoy!  

Source: Bake Space


Monday, August 22, 2011

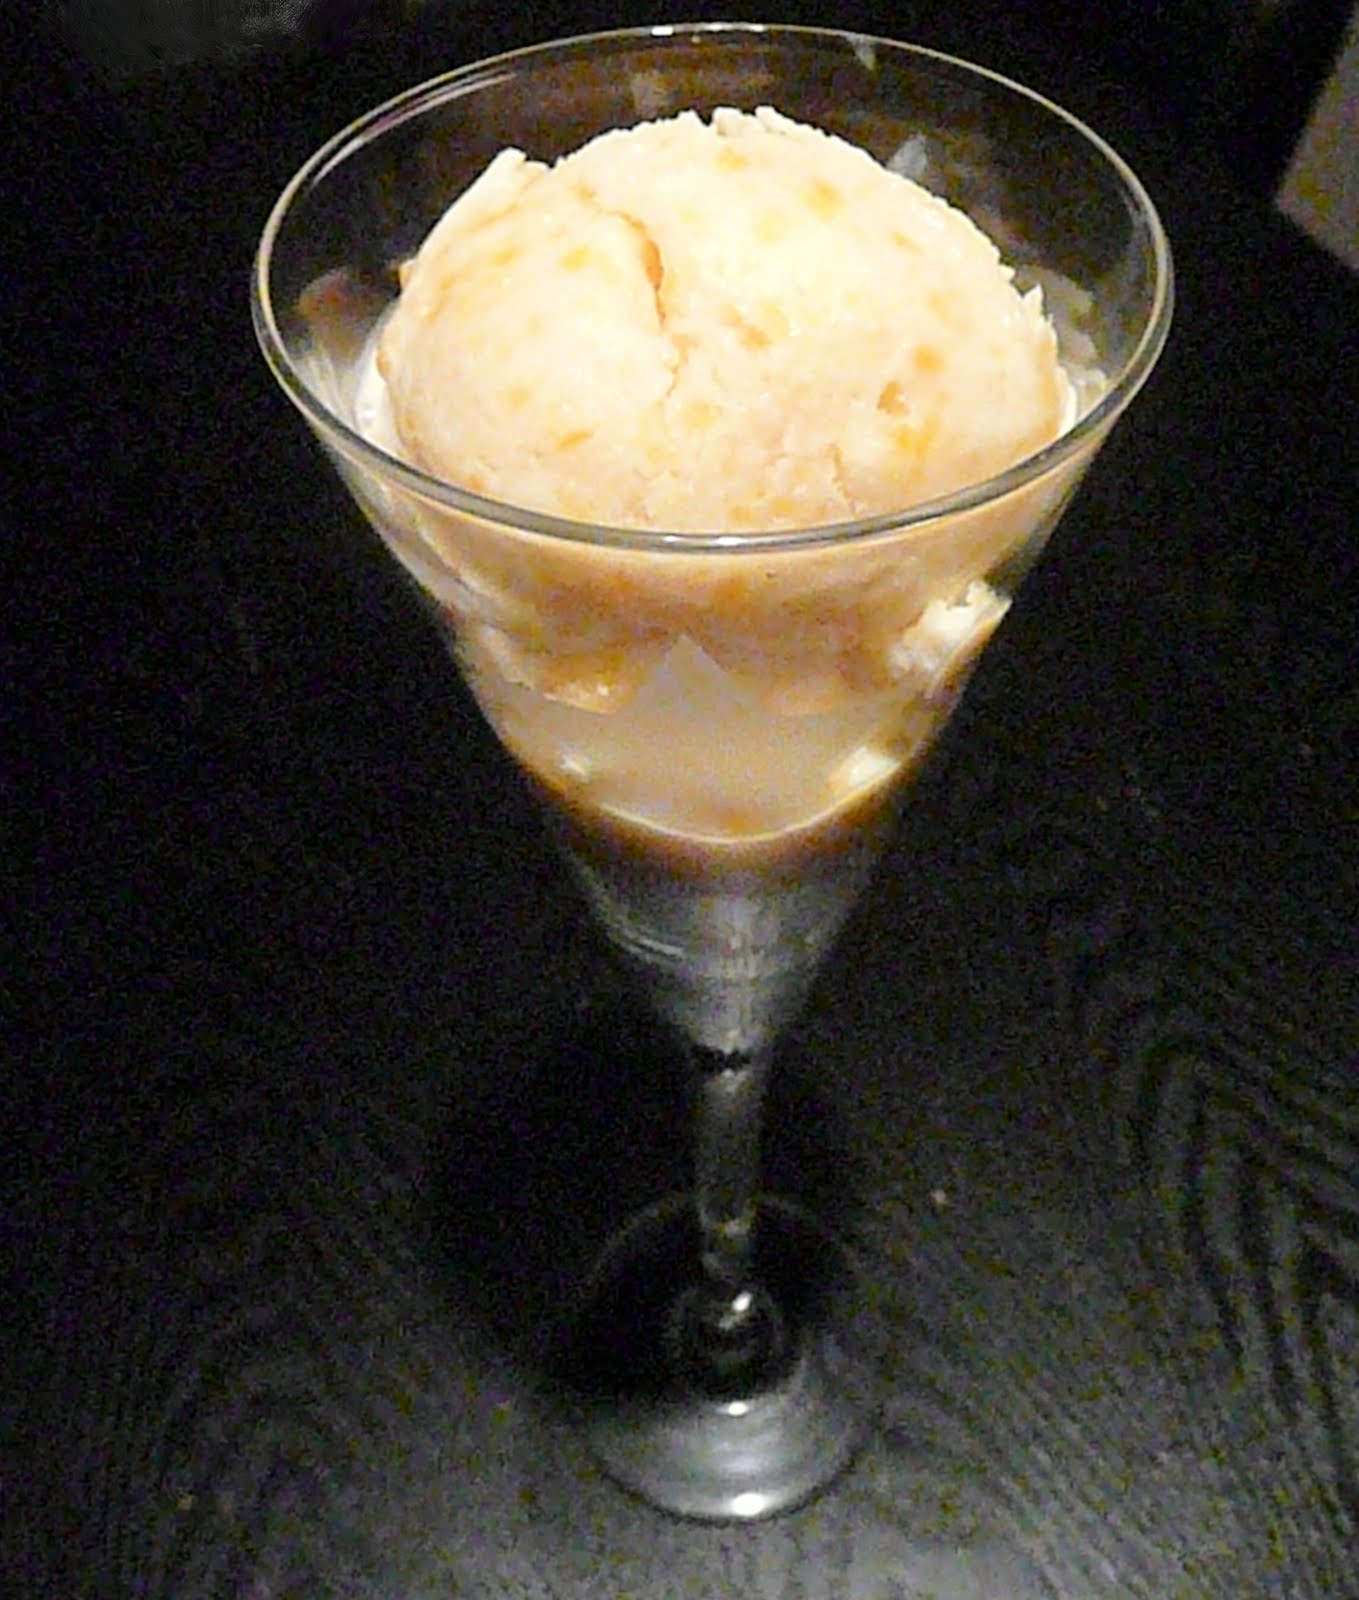
Coconut Mango Ice Cream


I have been seeing so many posts about ice cream lately so I have been craving it like crazy.  So I got a little creative and this is what I came up with. I have a hard time with a lot of dairy (milk) so I use coconut milk or soy milk whenever I can. We always have milk here because Rikard is one of those tall glass of milk guys… You know what I am talking about, one of those people who like to have a big glass of milk with a dessert. YUCK.  Just watching him drink his milk brings the heaves on!


I know I am weird, but milk and I have beef! Haha I love yogurt and cheese but there is something just really gross to me about milk. What? Don’t judge. I still cook with it! Ok enough of that… You are going to really like this it was so easy and so delicious. 

I don't have an ice cream maker and this was still creamy. 

Coconut Mango Ice Cream

Ingredients
1 can                Sweetened condensed milk
1 can                Coconut Milk
2 cups               Canned or frozen mangos (pureed)
Directions
1.  Mix all ingredients and pour into a freezer safe bowl. Freeze.
2.  Every 30 minutes for the first 3 hours stir the mixture. Enjoy.

Adapted from: Just One Cookbook


Monday, August 15, 2011

Kneaders Key Lime Pie


Rikard got home last night! I am so happy to have him home, not only to take Stella out but it’s really nice having him around.  One of the best parts about Rikard is how much he appreciates me cooking.  He is so sweet and proud of my cooking; it makes it all worth it! I am so lucky to have such a sweet and supportive husband.  Plus he will eat/ try just about anything I decide to make, even if it is awful. 

I always have a list of things we get at the grocery store every time.  On that list is milk, eggs, corona, and limes. Ok, ok there are a few more things but you get the picture… I love and ice cold Corona with a fresh lime squeezed in it.   Before we moved to Sweden beer and I had a pretty good relationship, in Utah I could drink a few 3.5 Bud lights and wake up the next day feeling refreshed.  Now that we are in Sweden, you cannot even get a Bud light and every beer is so strong! I learned that the hard way a few times.  So, I have learned if I buy the grocery store Coronas they are 3.5 and Corona is the closest thing to Bud light in this country.  So, there is always a space for my grocery store Coronas in Rikards beer fridge, and I always have several limes on hand.

When Rikard is out of town, I feel a little weird drinking all by myself. So this week I have too many limes, which is why I pulled out this recipe.  

Kneaders Key Lime Pie

Ingredients
Crust
1 ½ Cups           Crushed Pretzels
3 Tbsp               Sugar
6 Tbsp               Melted Butter
Lime filling
1 tsp                 Lime Zest
4                      Egg Yolks
½ Cup               Lime Juice
1 Can                Sweet and condensed milk

Directions
1. Mix pretzels, sugar and butter.  Press into bottom of pie pan and bake at 350 for 8-10 minutes. 
2. In a separate bowl. Whip egg yolks with the lime zest for 2 minutes. Add Condensed Milk and Juice, and mix. Let the mixture sit at room temperature for about 30 minutes, or until it thickens. 
3. Pour into pie crust and bake for an additional 30 minutes.
4. Chill. Serve with Whipped cream.


Friday, August 12, 2011

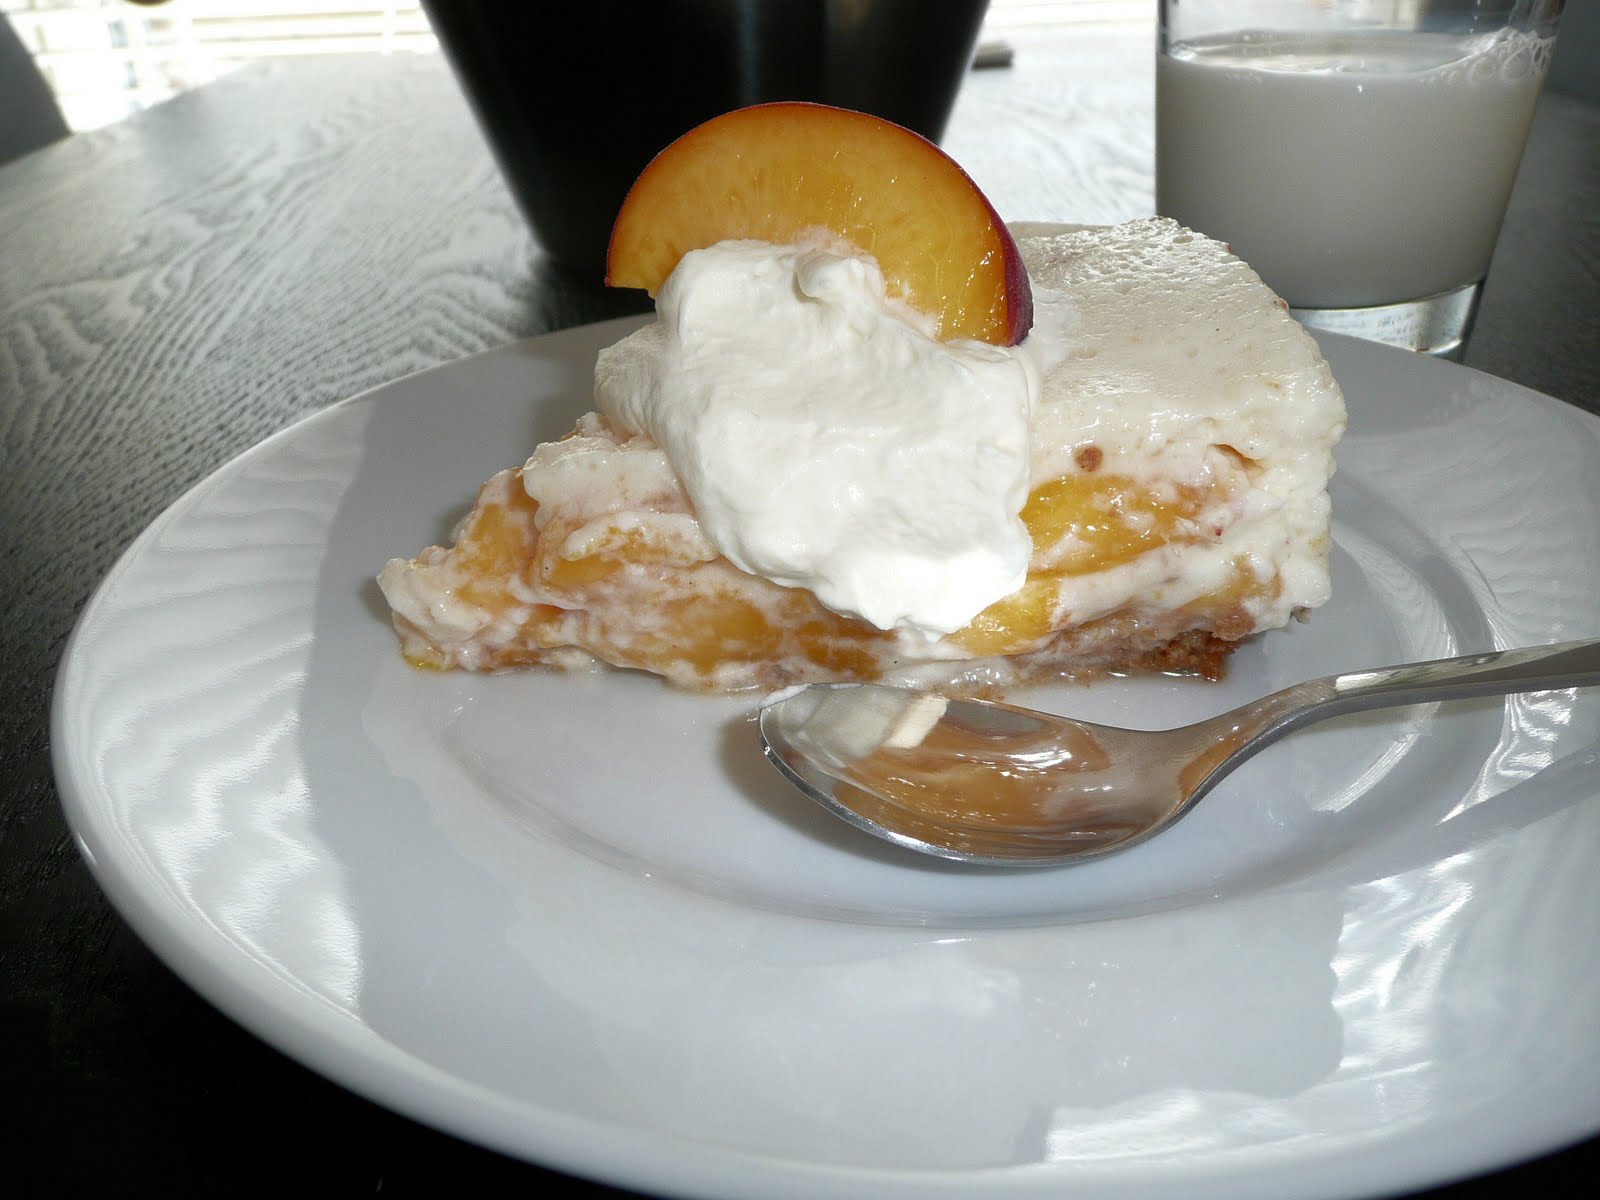
Aunt Joyce's Peaches and Cream


During my daily phone call with my Mamma (When I was born my cord was just severed not cut all the way. We are very close even with the 8 hour time difference!) She told me about a recipe she got from Aunt Joyce several years ago.  I had just bought a ton of peaches thinking I was going to make jam, so it was perfect timing.  Any who… Yesterday I had my really good friend Fanny over for dinner; I was so excited to get some human interaction and to be able to cook for someone!  Thank God Rikard gets home in a few days, I’m starting to get pathetic with the conversations I have with Stella. 

Nothing says summer better than fresh peaches!


 Aunt Joyce's Peaches and Cream

Ingredients:

1 ½ cup
3 Tbsp
5 Tbsp
1 ½ Cup
27
Dash
1 tsp
10
1 ½ cup

Crushed Graham crackers
Sugar
Melted Butter
Milk
Large Marshmallows
Salt
Vanilla
Peaches sliced
Whipped cream


Directions:
Crust
1. Mix crushed graham crackers, sugar, and butter. Press into the bottom of 9inch pan (Whatever style of pan you want)
2. Bake crust at 350 degrees for 10 minutes.
Filling
1. Melt 1 ½ cup milk and marshmallows over medium/low heat. Once all marshmallows are melted down remove from heat and let cool. 
2. Once cool, add dash of salt and vanilla.
3. Fold in peaches and whipped cream.
4. Chill for at least one hour before serving.

Adapted from: Joyce Tarbets recipe


 Dear Aunt Joyce, you are amazing, this dessert was delicious! I am now sending my Mom on a mission to get as many recipes of yours as possible. 
 

Wednesday, August 10, 2011

Grandma Birds Microwave Fudge


The hockey season has officially started for Rikard, so that means lots of alone time for me.  I always know when I have been alone for too long when I start talking to Stella like she is a person.  When Stella was a puppy I would dress her up in her pink little sweater, wrap her up tight in a blanket and take her to all the games.  Now, I think people would think I was a little strange if I brought in a 22lb sausage wrapped up in a pink blanket!
Oh dang! Isn't she cute? 

With Rikard being gone I have several problems…  I don’t sleep well, I’m bored, and I have no one to cook for.  So, when I can’t sleep I cook, when I am bored I cook, and I still have no one to eat all this food! Last night about midnight I remembered my sister Dena telling me about one of my Grandma Birds old recipes for microwave fudge.  The best part about this recipe is it really only took me 5 minutes! After I finished I started to think about all the lovely things I could/Should have put in it. Next time fresh raspberries are going to be in it, just thinking about it makes my mouth water!

This morning I woke up and had fudge for breakfast… What? Don’t judge me! It was delicious. 

Grandma Birds Microwave Fudge
Ingredients:

cups
½ tsp
1 tsp
1 can
2 cups

Milk Chocolate Chips
Salt
Vanilla
Sweetened Condensed Milk
Chopped nuts, candy cane, toffee, raspberries ect (optional)


Directions:
1.  Place all ingredients except nuts into microwave safe bowl.
2.  Microwave for 1 ½ minutes.
3. Stir until smooth add nuts or whatever you want in it.
4. Pour into a buttered pan and chill until firm. 


Tuesday, August 9, 2011

Banana Cookies

I had bananas that were getting too ripe on the counter, so I started searching for different recipes you can do with bananas.  To be honest bananas make my skin crawl, the thought of peeling a banana and biting into it makes me want to hurl! With that said… I do like banana bread in small portions.  I keep thinking that if I find the perfect recipe that I will change my mind.

Remember the candy Runts, the mixture of hard candies that are shaped like fruit?  Whenever I think about bananas that’s what pops into my head, I would spend so much time picking out the bananas.  The hardest part was finding someone to eat the bananas, no one likes the bananas! I blame Runts for my life long struggle with bananas.
Just my luck I always get the pack with like twenty extra bananas!

Ok, enough of my rants about Runts, haha! These cookies are a fun change from the banana bread and muffins I usually do.  Plus, you can’t go wrong when you cover something with frosting. 


Banana Cookies

Ingredients:

Cookie

¾ cup
¾ cup
2
Softened butter
Packed brown sugar
Mashed Bananas
1 tsp
1
1 tsp
2 cups
½ tsp
½ tsp
pinch
Frosting
2 Tbsp
3 Tbsp
2 Tbsp
1-2 cups
1 tsp
Lemon zest
Egg
Vanilla
Flour
Baking powder
Baking soda
salt

Butter
Brown sugar
Milk
Powdered sugar
Vanilla


Directions:

1.  Mix Butter and Brown sugar until creamy. Add bananas, zest, egg, and vanilla and mix.

2.  Add flour, baking soda, baking powder, and salt and mix

3.  Drop teaspoon size rounds 2 inches apart onto baking sheet with wax paper.  

4. Bake at 350 degrees for 10 minutes or until edges start to brown.

5. Cool completely

Icing

1. In a small sauce pan melt 2 tablespoons of butter, add brown sugar and milk once it boils remove it from the heat.

2. Add powdered sugar and vanilla. (if the icing gets too thick add a little more milk)


Sunday, August 7, 2011

Swedish Pineapple Pie

  Let me start by saying... I am obsessed with desserts! Last week Rikard and I were going to a wedding in a small town outside of Stockholm.  We got there a little early so we stopped off to have fika, (swedish for coffee and dessert. I'll explain later about this lovely word) the only place in town was a hostel.  As we went inside my thoughts were going from that scary movie where everyone gets killed to holy moley we are going to get food poisoning.  But the guy was so nice and told us all about how his sweet little wife made her special pie (dang we are suckers!).  So we dove right in... OH SWEET LORD I wanted to kiss his sweet little wife...And I didnt get sick! I take my desserts very seriously and I am not saying this lightly when I say the best dessert I have had in a very long time.
  So I made it my mission to copy and master this pie... Here is what I have for you.

Swedish Pineapple Pie


Ingredients:

Crust

¾ Cup
Butter
½ cup
1 ½ cups
Filling
1 ½ Cups
1 Cup
½ Cup
Sugar
Flour

Canned Crushed pineapple (Depending on the size of can I used 2)
Crème Fresh (Sour Cream)
Sugar

Directions:

1.  Mix melted butter, Sugar, and Flour and press into bottom of Pie pan.

2.  Mix Pineapple, Crème Fresh, and Sugar. Pour into pie pan.

3.  Bake at 375 degrees for 30 min