Tuesday, August 30, 2011

Tuna Casserole


My sister Dena is known for making a killer tuna casserole.  I struggle with tuna but Rikard loves it so I called her up the other day and had her walk me through it.  She suggested using bread crumbs on top but I didn’t have any so I used fried onions and it was delicious.  I love casseroles like this; you can pretty much put anything into them.  I actually really enjoyed this casserole and finally found a way I will eat tuna.

  This also would be a great freezer meal.  I am always on the lookout for good freezer meals. Whenever I go back to the States to visit I make a bunch of freezer meals for Rikard, I like to give him a good combination of meals.  I mean seriously poor guy all alone in the house without me, the least I can do is still feed him. Haha  

My dear friend Fanny says a saying that pops into my head right now… I hope I don’t mess this up. “When the cats go out, the rats come out to play”. Usually it is Fanny and I that are the rats when the guys are out of town working. 

Tuna Casserole

Ingredients
2 Cans               Tuna
2 Cans               Cream of mushroom or cream of chicken soup
4 Cups               Cooked macaroni noodles
7or8                  Sliced Mushrooms
1                      Diced onion
1 Cup                Frozen Peas
1 Cup                Shredded cheese
1 Cup                French’s fried onions Or any fried onions
Directions
1.  Cook noodles al dente. The last few minutes throw the onions into the boiling water (just to soften them up, so they aren’t too strong in the casserole)
2. Mix Tuna, Cream of mushroom/Cream of chicken, Noodles, Mushrooms, the softened diced onion and the peas. Pour into a casserole dish.
3. Sprinkle fried onions on top of the mixture and top that with shredded cheese. 
4. Bake at 350°F/177°C for 45 minutes. Enjoy.

Source: Dena Bird 


Sunday, August 28, 2011

Easy Mexican Flan


I have a secret love affair with (Shh don’t tell) Mexican food.  We are close I mean, really close. If it were up to me we would have Mexican food for dinner every night.  OK… I am pretty close with Indian food also but that’s for another day. 

Here in Sweden they honestly don’t know what Real Mexican food is… I mean seriously they put cucumbers in their tacos… WTF! It has been my mission ever since we moved here to teach as many Swedes what real Mexican food tastes like.  When you think Mexican dessert what comes to mind? Tres Leches and Flan, right? Well… Have I got a Flan recipe for you! I am sort of a Flan snob and I can honestly tell you I would choose this Flan over a crème Brule any day. The best part is, it’s actually really simple.  Who says you have to be Mexican to cook good Mexican food? 


Easy Mexican Flan

Ingredients
1 Cup and ½ Cup   Sugar
6                            Eggs
1 Can                    14 oz. Sweetened condensed milk
1 Cup                    Heavy cream
½ Cup                   Milk
1 tsp                     Vanilla
Or
Exchange the heavy cream and milk for 2 13 oz. cans of evaporated milk. 
Directions
1.  Put 1 cup sugar into a small sauce pan over medium heat stirring constantly. It will slowly melt down to a caramel color liquid. Be careful not to let it burn.
2. Once all of the sugar is liquid equally pour into ramekins (6 to 8 depending on their size). Swirl the liquid around until it has covered the sides. You will have to hurry it cools very quickly.  (I never get all of them perfect and it works out just fine)
3. Blend the eggs together, add the milks then slowly add the ½ cup sugar and vanilla. Stir until combined. 
3. Pour the milk mixture into the prepared ramekins. Place them into a large baking dish filled with 1 to 2 Inches (2.54 to 5cm) of water. Bake at 325°F/163°C for 45 minutes or until a toothpick or a knife comes out clean. 
4. Cool the ramekins in the refrigerator for at least one hour before serving.
5. Slide a knife around the edge then tip the ramekin over onto a plate the caramel sauce will spill over the custard. Serve with fresh berries or just alone. YUM!

Source: About.com  


Friday, August 26, 2011

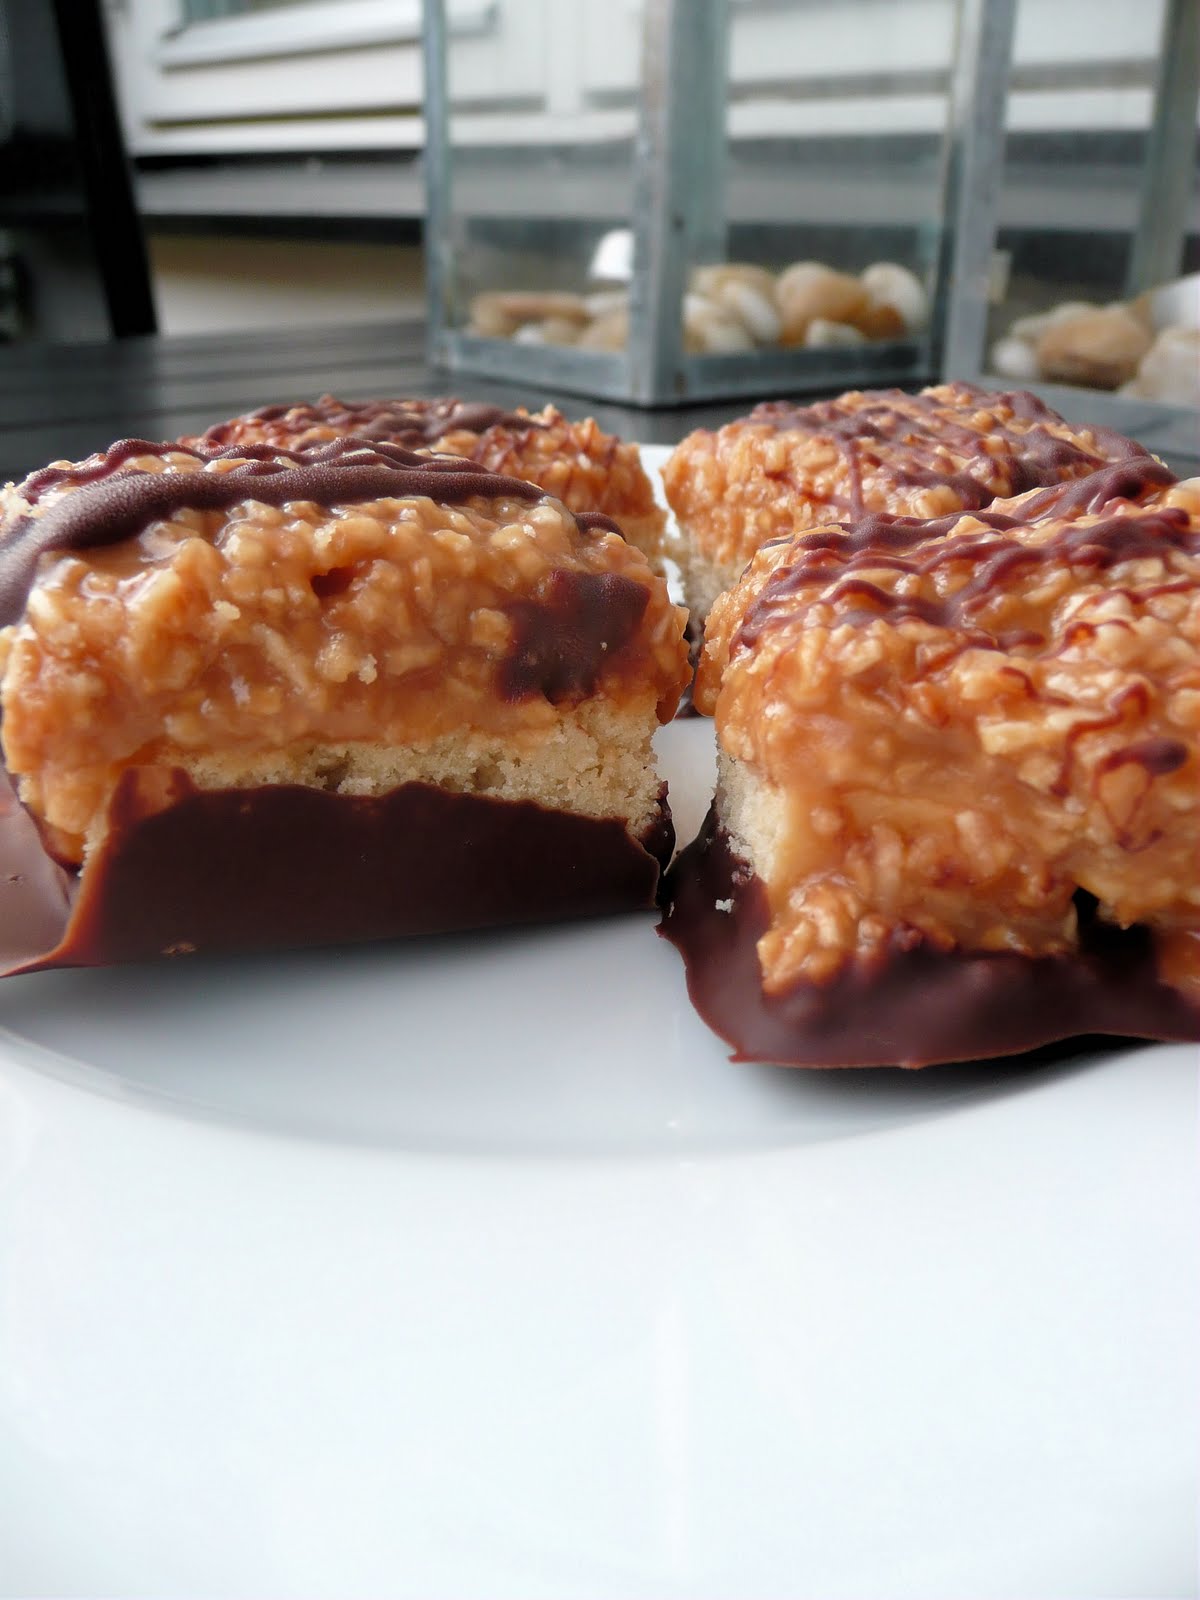
European Samoas Cookie


Do you remember what your favorite cookie was when you were a kid?  Well… Mine was the Girl Scout cookie called Samoas.  The perfect caramely coconutty cookie! Yes I did just say that, Spell check hates me right now.

 I have had a problem because ever since we moved to Sweden Girl Scout Cookies are not an option.  Until now… I came across a post from Claudia at What's Cookin' Italian Style Cuisine for these delicious little treat, she is a genius! So, here is my version of her Samoas cookie. I like to call them the European Samoas cookie… The richness of the homemade caramel makes them so delicious! 


European Samoas

Ingredients
Crust
½ Cup               Sugar   
¾ Cup               Butter
1                        Egg      
1 tsp                  Vanilla or vanilla powder
2 Cups               Flour    
½ tsp                 Salt
Topping
4 Cups             Coconut
1                      Batch of Microwave Caramel
1or2 Tbsp        Whipping cream
2 bars               Good Milk Chocolate
Directions
Crust
1. Mix Butter, sugar, egg and Vanilla.
2. Slowly add in flour and salt.
3. Push dough into bottom of a 9x13 pan.
4. Bake at 350°f/177°C for 20 minutes.
Topping
1. Put coconut in a microwave safe bowl and microwave on high for 3 to 5 minutes. Stirring it every 30 seconds, until it is all toasted.
2. Take the batch of caramel (if there is any left…) heat is back up in the microwave with 2 Tbsp of cream for 1 or 2 minutes. Just until its soft again.  
3. Add toasted coconut and spread over cooled crust. Refrigerate for an hour then cut into bite size squares.
4. Melt Chocolate and dip bottoms of each square. Drizzle remaining chocolate over top. Enjoy!


Wednesday, August 24, 2011

Microwave Caramel


There are a few things about me that you have probably already figured out. #1 I love quick and easy recipes (I have a very short attention span). #2 I love making things in the microwave (it just makes it so much easier!).  I am so excited to share this recipe with you I can barely stand it!


I’ll back up a bit… A few days ago Stella decided to eat one of my plants, this darn dog eats everything! This specific plant is very poisonous and she had an extreme allergic reaction. So within 5 minutes of me getting after her for eating the plant, she swelled up like a balloon. We immediately jumped into the car and headed to the vet (this was very dramatic I was yelling at Rikard to drive faster the entire time).  Thank goodness we live close to the vet because by the time we got there poor little Miss Stella had stopped breathing.  So, there I am running into the vet screaming “I need help!” carrying Stella.  They immediately got her on oxygen, gave her shots and saved our sweet little pup. After everything settled down, all I could think was the little girl in Charlie and The Chocolate Factory. Violet Beauregarde, the gum chewing champ, who blew up like a blueberry! Good thing she is cute! (Stella not Violet Beauregarde).

So needless to say, I needed some serious cooking therapy when we got home.  The first thing I did was pop this into the microwave. Oh delicious caramel you fix everything!


Microwave Caramel

Ingredients
½ Cup               Butter
½ Cup               Light corn syrup
½ Cup               Light brown sugar
½ Cup               White sugar
½ Cup               Sweetened condensed milk
1 tsp                 vanilla
½ Cup               Chopped Nuts (optional)
Directions
1.  Melt butter in microwave safe bowl. Stir in corn syrup, both sugars, and sweetened condensed milk. Mix until sugars are dissolved.
2.  Microwave on high for 3 ½ minutes. Stir.
3.  Microwave on high for an additional 3 ½ minutes (soft-ball stage)
4.  Stir in vanilla and nuts (if you add them)
5.  Spray a dish with non stick spray. Pour into dish and refrigerate until set.
6.  Cut into squares and wrap in plastic wrap. Enjoy!  

Source: Bake Space


Monday, August 22, 2011

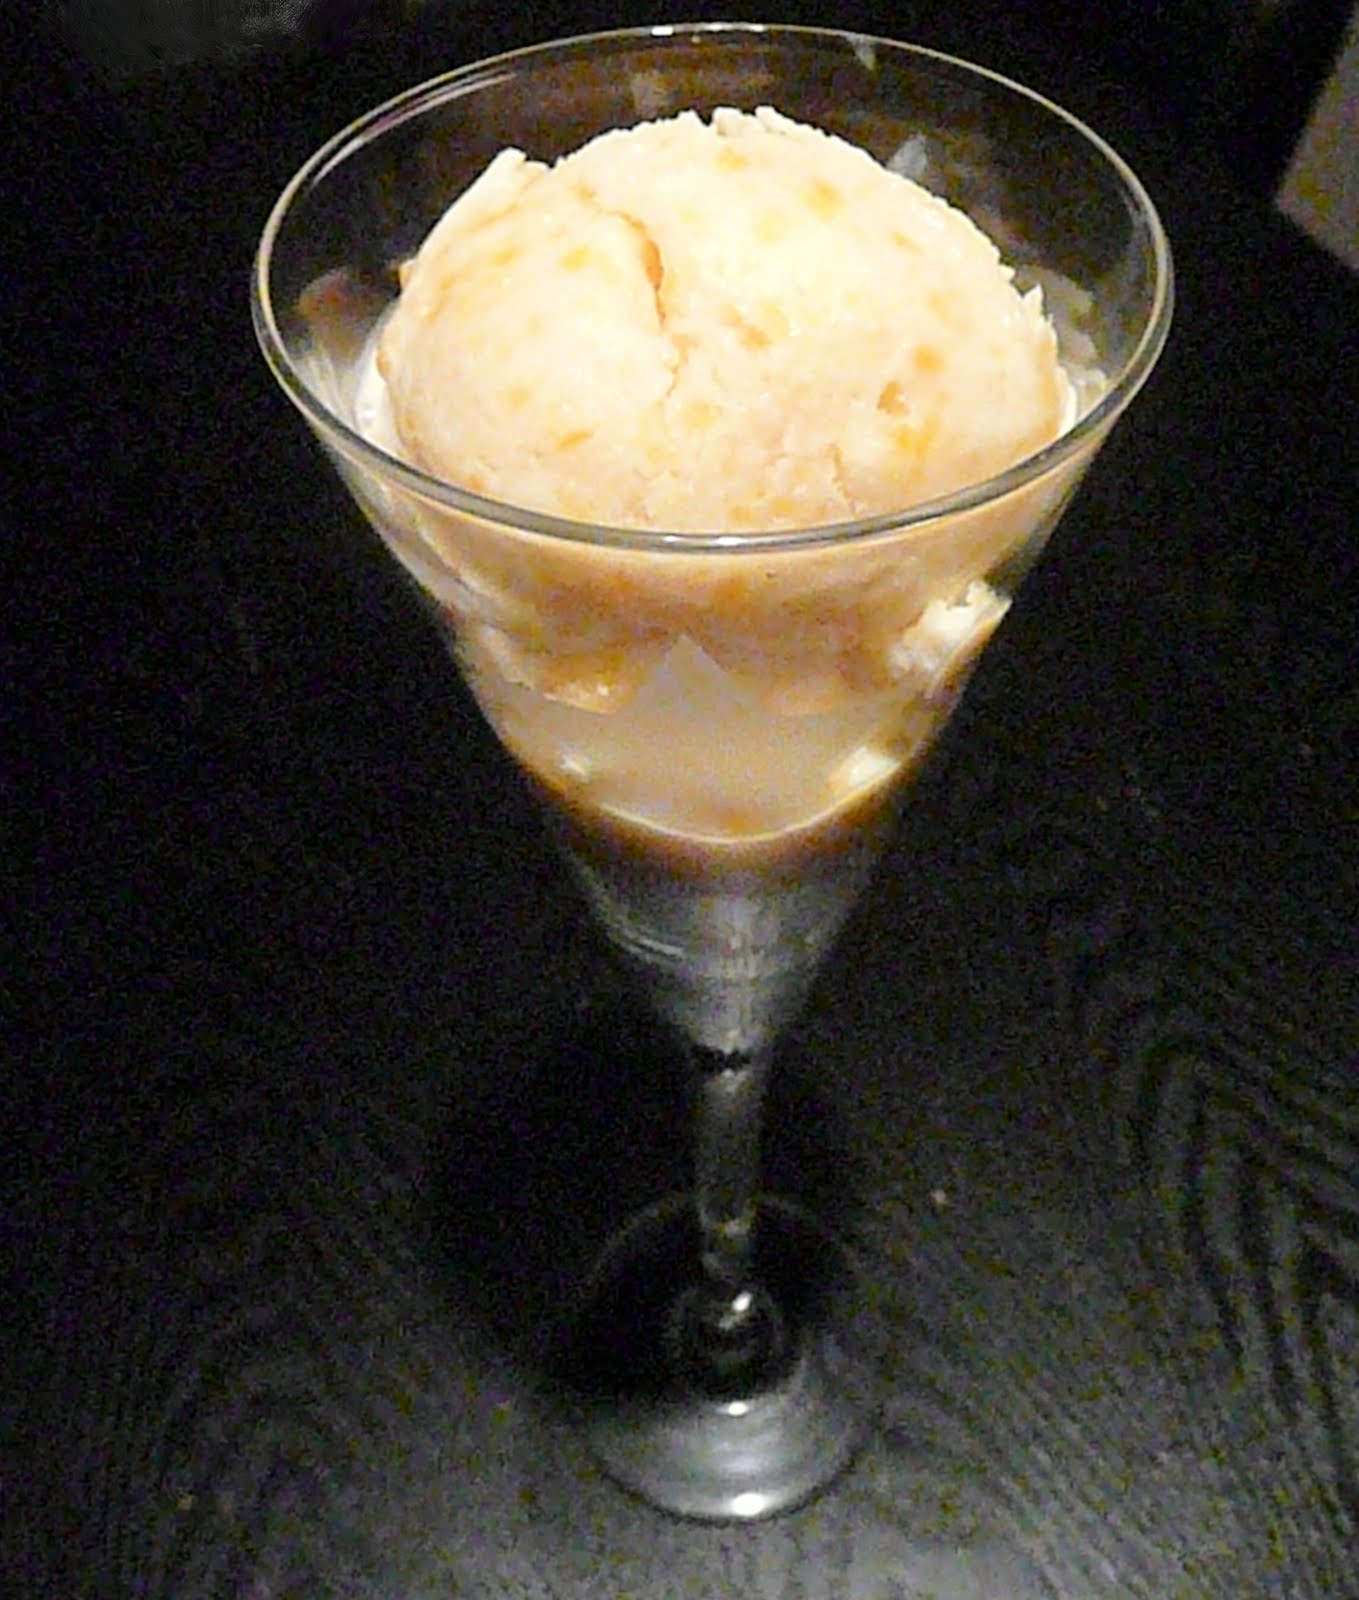
Coconut Mango Ice Cream


I have been seeing so many posts about ice cream lately so I have been craving it like crazy.  So I got a little creative and this is what I came up with. I have a hard time with a lot of dairy (milk) so I use coconut milk or soy milk whenever I can. We always have milk here because Rikard is one of those tall glass of milk guys… You know what I am talking about, one of those people who like to have a big glass of milk with a dessert. YUCK.  Just watching him drink his milk brings the heaves on!


I know I am weird, but milk and I have beef! Haha I love yogurt and cheese but there is something just really gross to me about milk. What? Don’t judge. I still cook with it! Ok enough of that… You are going to really like this it was so easy and so delicious. 

I don't have an ice cream maker and this was still creamy. 

Coconut Mango Ice Cream

Ingredients
1 can                Sweetened condensed milk
1 can                Coconut Milk
2 cups               Canned or frozen mangos (pureed)
Directions
1.  Mix all ingredients and pour into a freezer safe bowl. Freeze.
2.  Every 30 minutes for the first 3 hours stir the mixture. Enjoy.

Adapted from: Just One Cookbook


Saturday, August 20, 2011

Cucumber salad


One of my favorite parts about summertime is all the fresh produce.  I love cucumber salads, there is something so refreshing about them.  I have dill growing like crazy so I wanted to make a cucumber salad with lots of dill.  Here is what I came up with, it was so good.

Cucumber Dill Salad

Ingredients
2                      Cucumbers sliced very thin
1                      Red Onion Sliced very thin
1                      Red bell pepper sliced
1                      Yellow Bell pepper sliced
2 Tbsp               Fresh dill Chopped
½ Cup               White wine vinegar
3 Tbsp               Sugar
                        Pepper
Directions
1. Slice Cucumbers, onion, and bell peppers. Add Chopped dill.
2. In a small bowl whisk together vinegar, sugar and pepper until the sugar is dissolved. Pour over the vegetables and toss.
3. It is great served immediately or even better if you let it sit for a while.  

Thursday, August 18, 2011

Delicious White Bread


My Grandma is going to be so proud of me! She has always been the best at making bread. When I was younger we would go visit Grandma and Grandpa and the house would always smell like fresh baked bread.

Take a slice of warm bread right out of the oven, put lots of butter and home-made jam on it = pure heaven!


To be honest I had no clue how to make bread, so I went to youtube and looked up how to knead. This recipe has to be pretty fool proof because for my first time kneading it turned out pretty great. 

Grandma Doris’ White Bread

Ingredients
2 Pkgs               Active dry yeast
2 2/3 Cup          Warm water
½ Cup               Dry milk
2 Tbsp               Sugar
1 Tbsp               Salt
1/3 Cup             cooking oil (I used vegetable oil)
7 cups               Flour
Directions
1. Sprinkle yeast on the warm water and stir it to dissolve.  Add the dry milk, sugar, salt, oil, and 3 cups of the flour. Mix with an electric mixer on medium until smooth (about 3 minutes).
2. Gradually add the remanding flour to make soft dough (It will leave the sides of the bowl).  Cover and let sit for 15 minutes.
3. Knead the dough on a floured surface until smooth (about 5 minutes). Divide the dough in half. Shape each piece into 2 greased and floured 9x5x3 loaf pans.  Cover and let rise for an hour to an hour and a half.
4. Bake in a 400°F/205°C oven for 30 to 35 minutes, until the bread sounds hollow when you tap the top of it.  Remove from pan to cooling rack.  Enjoy.

Source: Doris Sweeten  

Tuesday, August 16, 2011

Navajo Tacos


I have been looking for something different to make, I sometimes get into a cooking rut.  I get worried about trying new things because I am afraid they won’t taste as good as something I know how to cook,   but last night I was feeling dangerous! I wanted something not only new but something I have never done.  I searched and searched and finally came up with these.

When I was a kid and we would go to the State Fair three things really stuck out in my mind… (Mom this one is for you haha) The people watching, the animals (especially the sheep), and the Navajo Tacos! If you haven’t gone to the State Fair and had a true Navajo Taco, this year is your year! You need to go to the State Fair find a really good bench, load up a giant Navajo Taco, get an ice cold beer, eat, drink and enjoy the people watching.  Seriously where do these people come from? I swear the State Fair brings out a different breed of people.  DON’T KNOCK IT TILL YOU TRY IT! SERIOUSLY!!!   Wait… I almost forgot, after all that lovely goodness of the Navajo Taco and the happy feeling from all the laughing. Work your way over and check out the animals.  The more I think about this maybe you should check out the animals before you eat, it’s pretty disgusting and stinks to high hell in there.  Good luck! 

Navajo Tacos

Ingredients
Taco bread
1 Cup    Flour
¼ Tsp   Salt
1 tsp     Powdered Milk
1 tsp     Baking Powder
½ Cup   Water
1          Bottle Vegetable Oil (for frying)
Toppings
1 Lb      Ground beef
1Cup     Chopped onions
1 Can    Rotel tomatoes
1 Pkt     Taco seasoning
1can     Black or refried beans
1          Head of lettuce
3 or 4    Tomatoes
1 can    Sliced black olives
            Salsa    
            Ranch dressing  
Directions (fry bread)
1. Whisk together Flour, salt, powdered milk, and baking powder in a large bowl. Pour water on the flour mixture all at once and stir with a fork until it is a large clump.
2. Don’t knead the dough just mix it with your hands to form a ball. Cut it into 4 pieces.
3. With floured hands stretch each piece to form a disk about 5 to 7 inches.
4. Heat the vegetable oil to 350°F/176°C (Do not let it get so hot it smokes) Test it by dropping a small piece of dough in and see if it begins to fry.
5. Take formed dough and gently place into oil be careful not to splash. Fry until brown then flip and fry the other side. About 2 to 3 minutes on each side. 
Directions (Meat filling)
1.  Brown the ground beef, Rinse or drain the fat off, and add the onions, tomatoes and taco seasoning. Simmer until the onions are soft.
2. Heat the beans.
3. Chop lettuce and tomatoes
4. Pile it all on top of fry bread like a taco salad. Enjoy.


Monday, August 15, 2011

Kneaders Key Lime Pie


Rikard got home last night! I am so happy to have him home, not only to take Stella out but it’s really nice having him around.  One of the best parts about Rikard is how much he appreciates me cooking.  He is so sweet and proud of my cooking; it makes it all worth it! I am so lucky to have such a sweet and supportive husband.  Plus he will eat/ try just about anything I decide to make, even if it is awful. 

I always have a list of things we get at the grocery store every time.  On that list is milk, eggs, corona, and limes. Ok, ok there are a few more things but you get the picture… I love and ice cold Corona with a fresh lime squeezed in it.   Before we moved to Sweden beer and I had a pretty good relationship, in Utah I could drink a few 3.5 Bud lights and wake up the next day feeling refreshed.  Now that we are in Sweden, you cannot even get a Bud light and every beer is so strong! I learned that the hard way a few times.  So, I have learned if I buy the grocery store Coronas they are 3.5 and Corona is the closest thing to Bud light in this country.  So, there is always a space for my grocery store Coronas in Rikards beer fridge, and I always have several limes on hand.

When Rikard is out of town, I feel a little weird drinking all by myself. So this week I have too many limes, which is why I pulled out this recipe.  

Kneaders Key Lime Pie

Ingredients
Crust
1 ½ Cups           Crushed Pretzels
3 Tbsp               Sugar
6 Tbsp               Melted Butter
Lime filling
1 tsp                 Lime Zest
4                      Egg Yolks
½ Cup               Lime Juice
1 Can                Sweet and condensed milk

Directions
1. Mix pretzels, sugar and butter.  Press into bottom of pie pan and bake at 350 for 8-10 minutes. 
2. In a separate bowl. Whip egg yolks with the lime zest for 2 minutes. Add Condensed Milk and Juice, and mix. Let the mixture sit at room temperature for about 30 minutes, or until it thickens. 
3. Pour into pie crust and bake for an additional 30 minutes.
4. Chill. Serve with Whipped cream.


Saturday, August 13, 2011

Halloumi


Say hello to my little friend! Have you met?

 It is the most delicious cheese in the world, Halloumi.  My favorite appetizer of this summer is this lovely cheese fried or grilled with sautéed onions on top.  It is so simple and so delicious.  I just can’t seem to get enough! Just slice it and brown it or grill it on both sides. It is best if you serve it warm.  It’s perfect just alone or with onions on top.  Or if you are feeling really bad, stick chunks of it on your shish kebabs!